Shopping Cart

Easy Hacks:

Effortless Dip Mani Removal Without an Electric Nail File at Home!

Doing nails using dipping powder may be less common and popular than gel manicure, but once you’ve tried it, you will be addicted to it. In case you don’t know, the main difference between gel and dip powder is that gel is applied wet with a brush and need to be cured with a UV/LED lamp, while dip powder is smooth powder requiring no lamp to be cured but needs to be used with specialized nail adhesive called dip liquid.

Some main advantages of dip powder includes that it doesn’t require a curing lamp (faster and safer), it doesn’t require techniques to apply gel polish with a brush (easier), and it protects brittle nails with a harder and thicker coating for up to 5 weeks if treated with care (more durable).

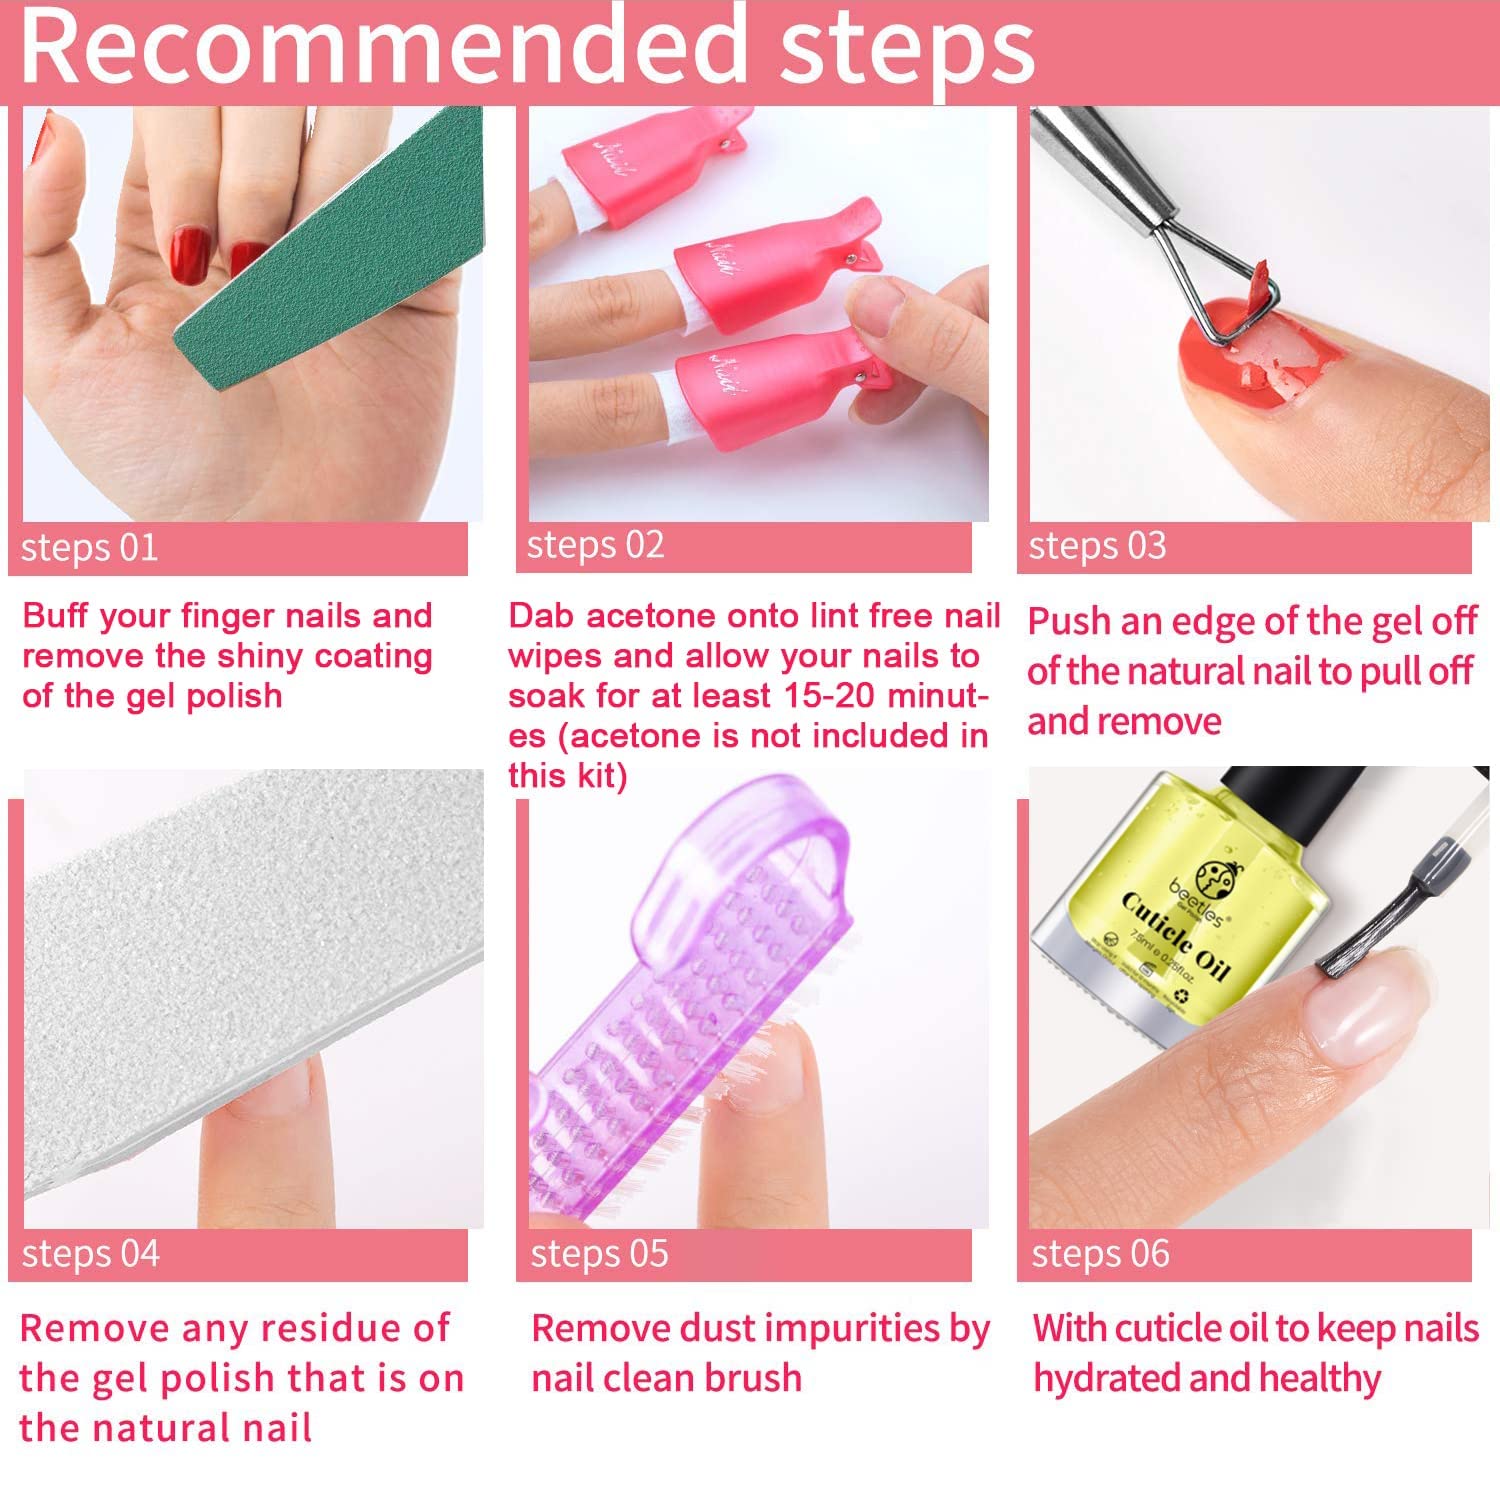
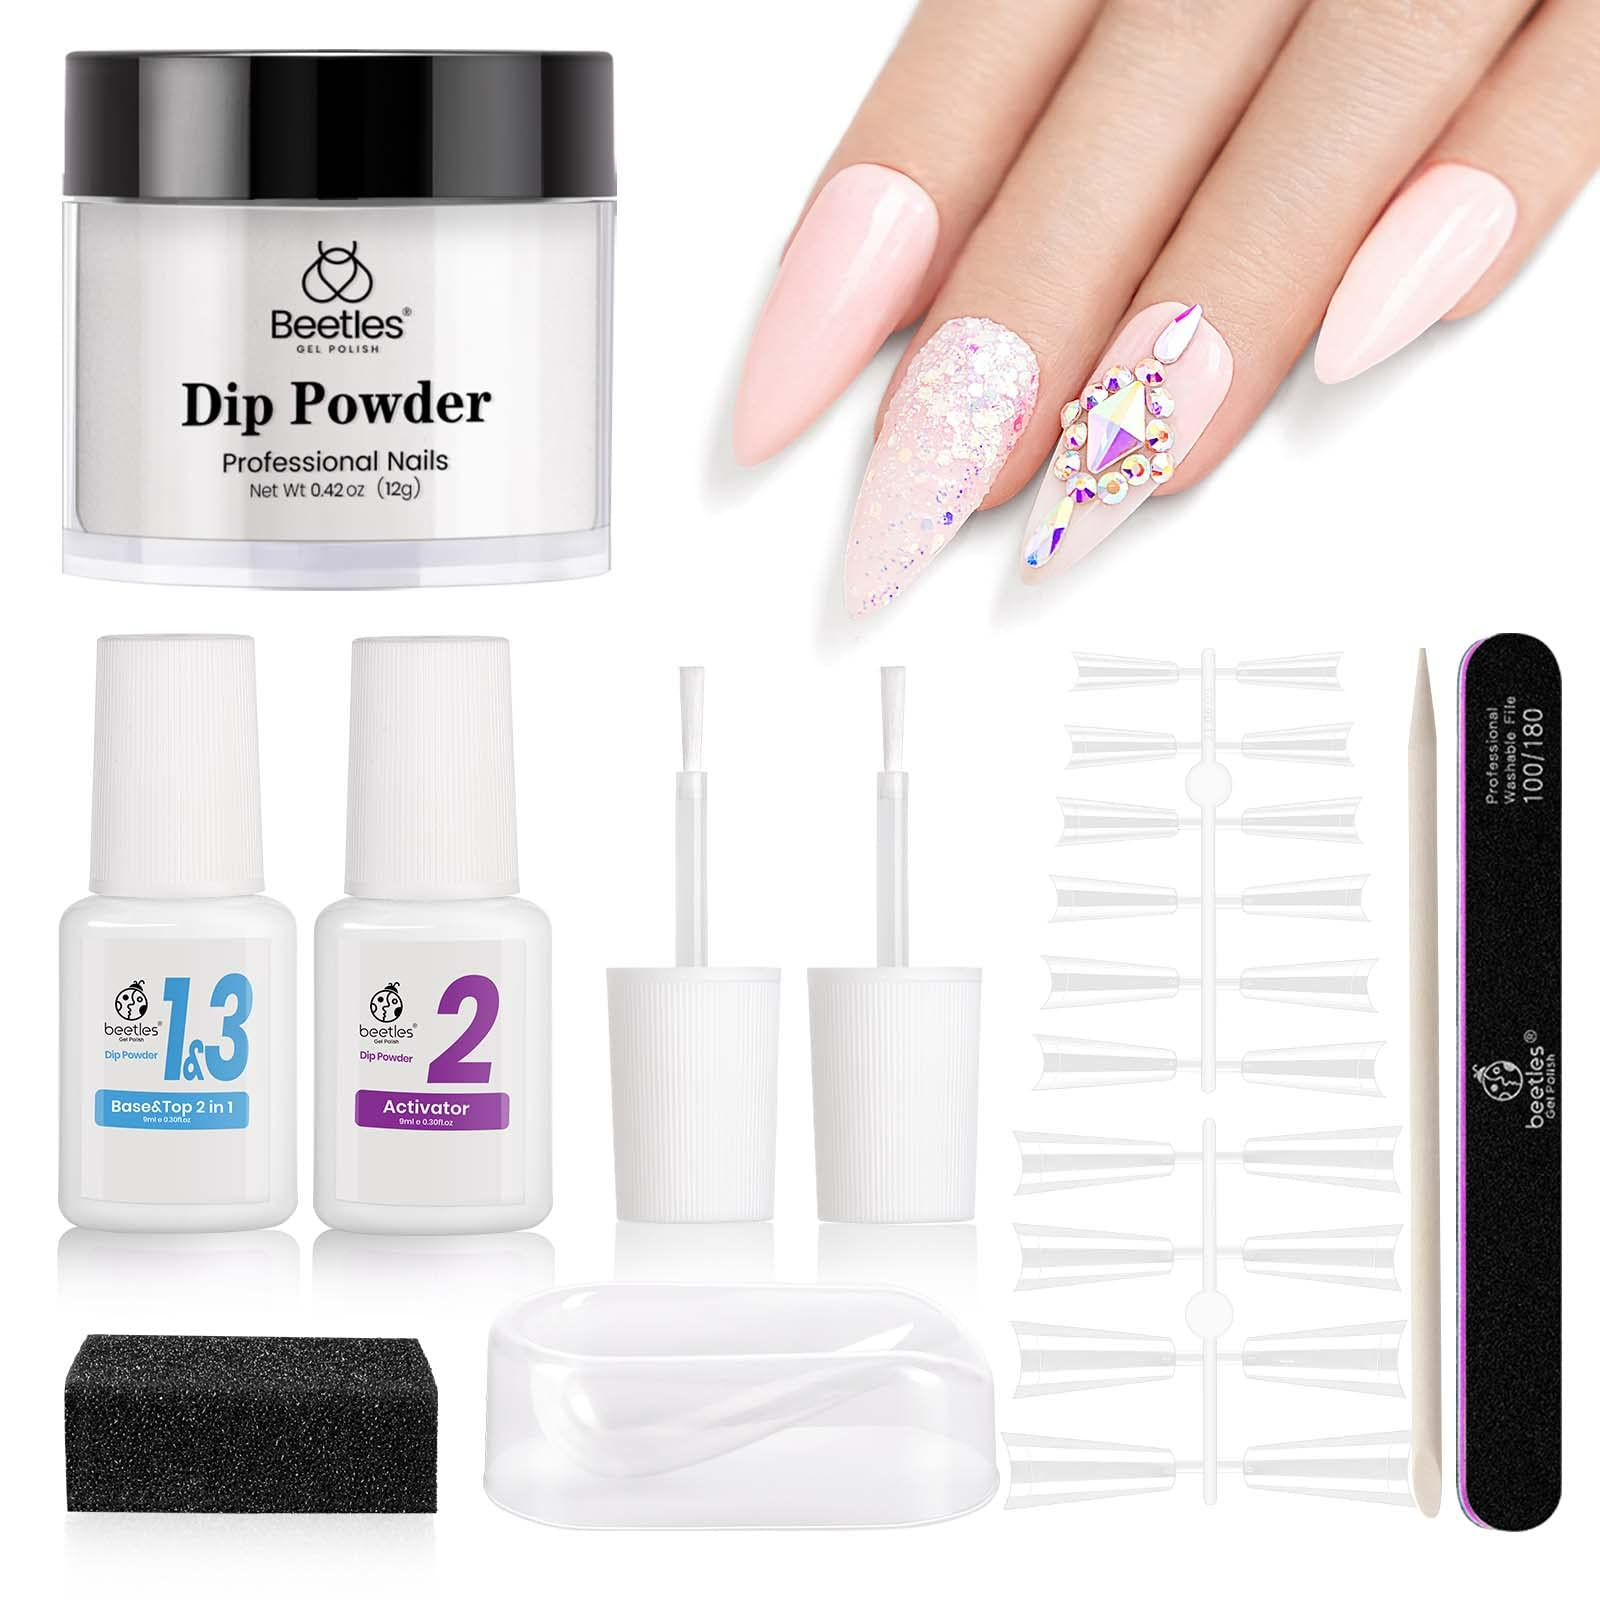
However, the difference in application and strength also result in a tougher removal. Normally, dip nails need to be professionally removed in a salon. Or if you’re a nail pro, you can use an electric file to remove them at home without ruining your natural nails. But rest assured, dip nails are actually easier to remove than other nail enhancements such as acrylic powder or poly gel.
 
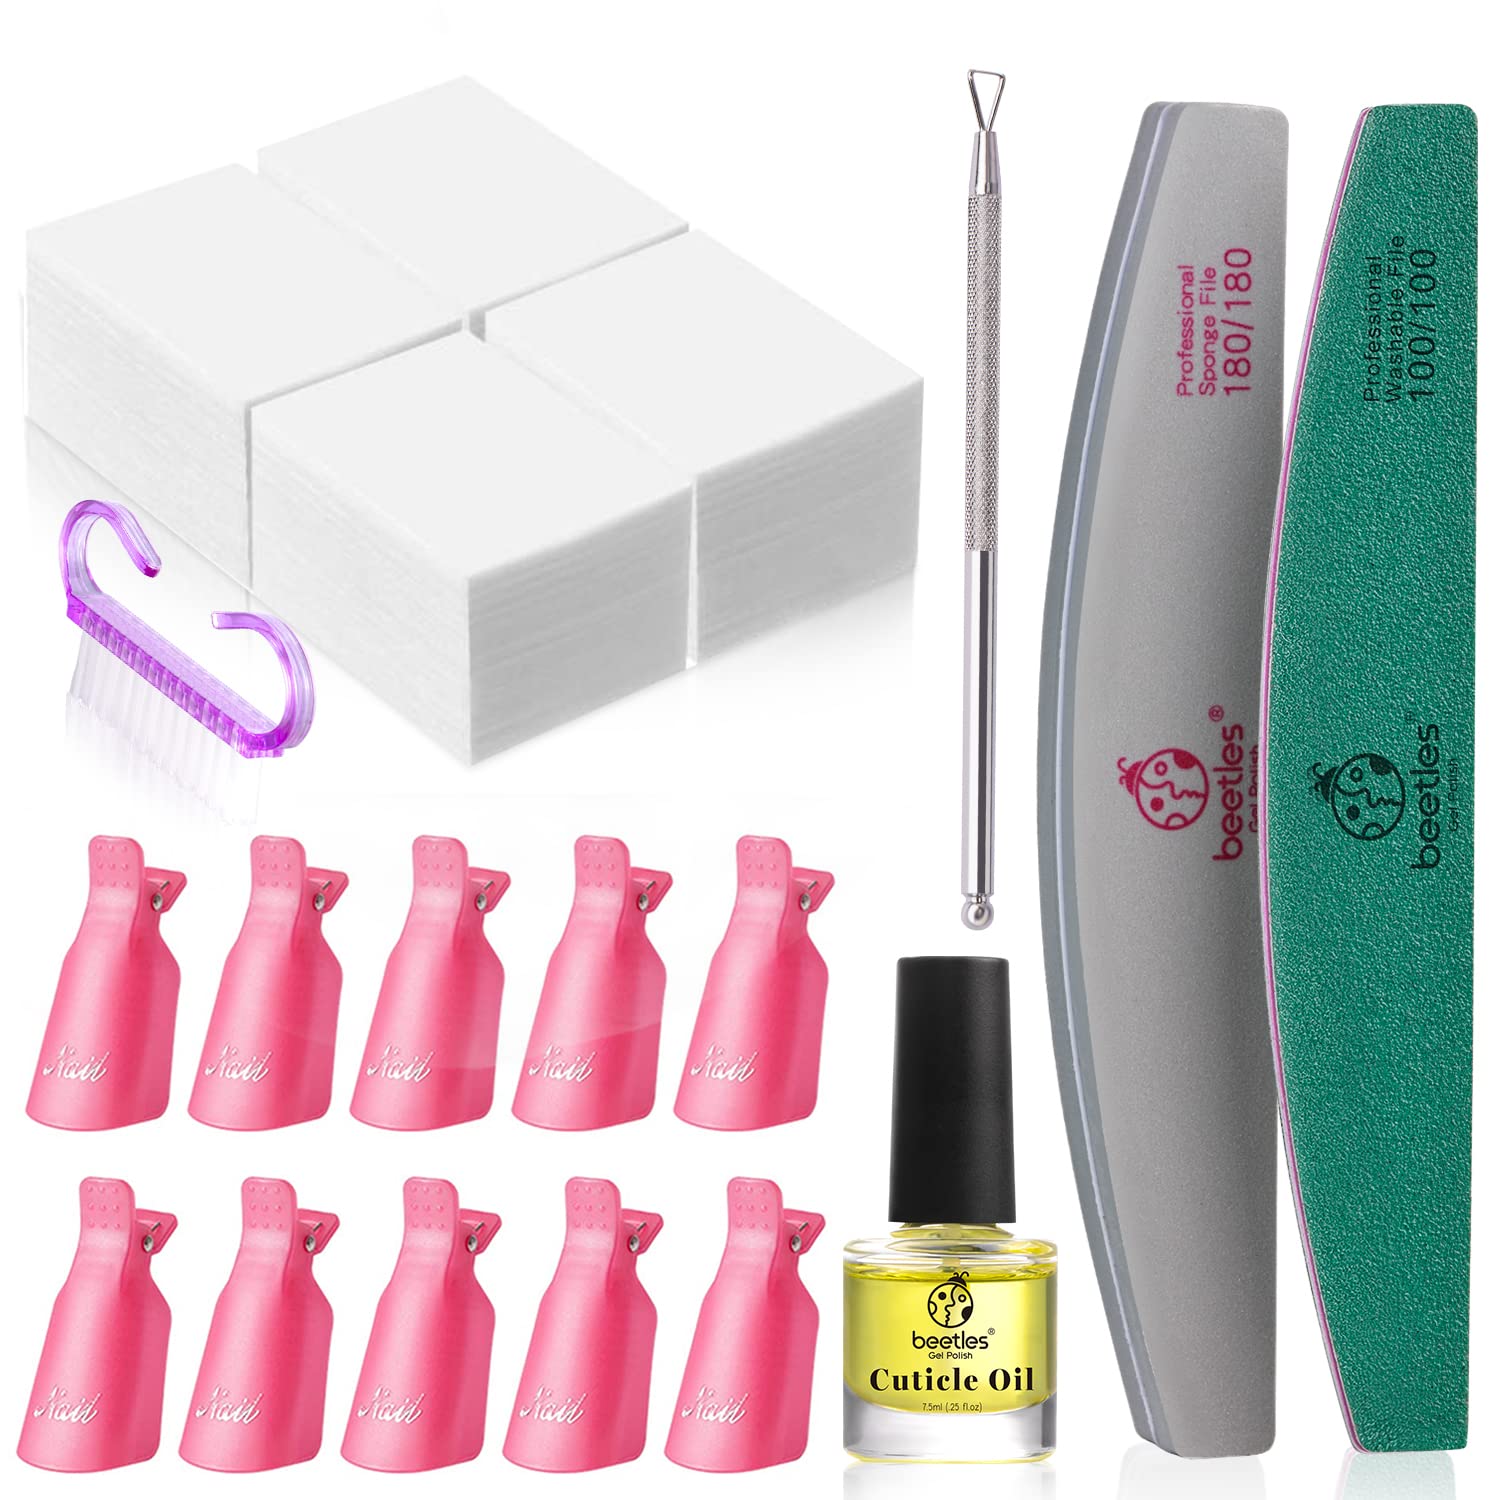
If you can’t go to salon to get them removed and you don’t want to use electric files, here are the tools you need to prepare before removing them: nail clippers, a double-sided file with two grits (100/180), a nail buffer, acetone nail polish remover, a cuticle pusher and a bowl that your hands can fit in. Now before the removal, you may wanna find a place near the window because the smell of acetone can be a lil bit strong.
Step 1: Cut and File
First, use the clippers to cut off the dip nails to your natural nail length. Next, use the rougher side of the nail file(100 grit, the smaller the figure, the coarser the surface of the nail file) to remove the glossy top coat of the dip nails by buffing. Try to buff your nails thinner so that you can spend less time soaking them later, but not too thin that it starts to hurt your natural nails.
 
Step 2: Soak Nails in Acetone
Pour the acetone into the bowl and soak all of your nails in for 10-20 minutes. The dip flaking off is your reminder that you are done soaking. If you don’t see any sign of flaking, you’ll need to soak them for an additional 5-7 minutes.
 
Step 3: Push Off the Dip Gently
Once the dip starts to loosen, use the cuticle pusher(or a wooden stick if you don’t have one) to lightly scrape off the dip. The dip shall come off without much efforts. Do not force or pull off.
 
Step 4: Buff and Shape
First, use the buffer to gently rub off remaining pieces of the dip and even out the nail plate. Second, use the nail file(180 grit) to shape your natural nails in case they are jagged and uneven. If you find your nails are weakened by removal, remember to keep them short to prevent splitting or breaking.
 
Last Step: Apply Cuticle Oil
Apply cuticle oil around the cuticle area and massage to moisturize the area from all the filings. Also, apply heavy hand cream to hydrate your hands from the acetone soaking.
When the dip is removed, your nails are completely ready for another dip manicure. The dip manicure can protect your natural nails if they were weaken during the removal. Also, since dip manicure requires no UV curing, you won’t suffer from the burning sensations even your nail plates become thinner.
 
What’s more, applying new dip nails now also saves you from the nail prep process which may cost you the most of the time in a dip mani. So why not dip into the vivid color of the silky smooth dip powder now?